


HELPFUL HINTS
Click on the desired subject:
A. To Avoid Contamination:
1. Swirler system must always be in upright position.
2. Do not start air flow until patient and Swirler are securely connected and noseclip is in place.
3. Do not disconnect patient from the Swirler prior to termination of air flow.
4. Once air flow is terminated, allow patient to take 3-5 breaths before disconnecting from system.
5. Use #1201 Tubing Connector for patients who cannot keep head straight and/or still.
6. Except for infants, use a SEAL-RITETM Mouthpiece, model #1021, for difficult patients, instead of a mask, to obtain cooperation and a good seal without contaminating the nasal passages.
7. Prepare to wrap the mouthpiece with a tissue, when it is removed from the patient's mouth, to prevent contamination from radioactive saliva.
8. Observe the recommendations in B, N & P below on dosing location, quantity, pressure, flow and accumulation measurement using a survey meter. Waiting to completely empty the nebulizer can cause 'leak through contamination' of the over saturated filtration media. Dosing to a survey meter reading of the lungs is preferred. See B1 and B2 below.
(Return to beginning)
B. Where To Dose The Patient:
A helpful and safe technique is to dose every patient away from the Scintillation camera. This improves patient through-put as well as eliminating accidental detector contamination. Dosing in front of the camera is a habit we have carried over from the Xenon and Krypton protocols that is not necessary for aerosol. Rather than use the camera to determine when there is sufficient uptake, place a survey meter against a lung and do the following.
1. For a pre-perfusion patient you have sufficient imaging uptake when the survey meter indicates a minimum of 1. 5 mR/hr (15 µSv).
2. For a post-perfusion patient you have sufficient uptake after adding a minimum of 1. 5 mR/hr (15 µSv) to the meter indication.
NOTE: However, if you prefer to use a gamma camera, the indication of > 500 cnts/sec (not 1,000 cnts/sec as required by competing aerosol systems) can be used in place of a survey meter reading.
At the completion, shut off the oxygen and allow a few additional breaths to purge the Swirler prior to detaching from the patient. Now there is sufficient uptake for a high information density image of the lungs without central and upper airways activity ( see Swirler article titled “Think ‘Unit Area Information Density,’ not ‘Field of View Count Rate’ ” ).
(Return to beginning)
C. Breath Holding to Improve Dose Deposition:
One recommended reading is “In Vivo Measurements of Aerosol Dose and Distribution: Clinical Relevance” by Beth L. Laube, Ph.D. of the Johns Hopkins Univ., Baltimore, MD 21205. Published in the “Journal of Aerosol Medicine, Vol. 9, Supplement 1, 1996”. In her article, on page S-82, Dr. Laube cites Dr. S. P.. Newman who demonstrated that a breath-hold of 4 seconds was most beneficial to patients with COPD ( i.e. improved aerosol deposition ) when they began inhaling aerosol at a low volume ( i.e. at 20% vital capacity ), compared to inhalation that began at 50% or 80% of vital capacity. From this AMICI recommends that the patient be instructed to take a normal inhalation breath and delay exhalation 4 to 6 seconds to maximize deposition and shorten the dosing time.
(Return to beginning)
D. Collimator Choice:
Typical choice is a General All Purpose type collimator. Use of a higher resolution collimator will result in a significant decrease in count rate and an increase in Dosing and Imaging Accumulation Times. The collimator should always be positioned flush to the patient to maximize resolution and count-rate efficiencies.
(Return to beginning)
E. Dose Quantity:
The typical dose is in the range of 15mCi (555 MBq) per cc (ml) for pre-perfusion and at least twice that for post perfusion with 1-2cc (ml) as a usual volume. For a lung ventilation study, the Swirler® Aerosol System is intended to be used with Technetium 99m-DTPA. The use of any other radiopharmaceutical could alter the production of aerosols and/or the efficacy of the filtration media resulting in sub-optimal quality images and contamination of the environment.
(Return to beginning)
F. Image Accumulation:
The typical image is in the range of 150 K preset counts for pre-perfusion and at least twice that for post perfusion. Gray scaling should be set to the same preset counts level used for the image accumulation.
(Return to beginning)
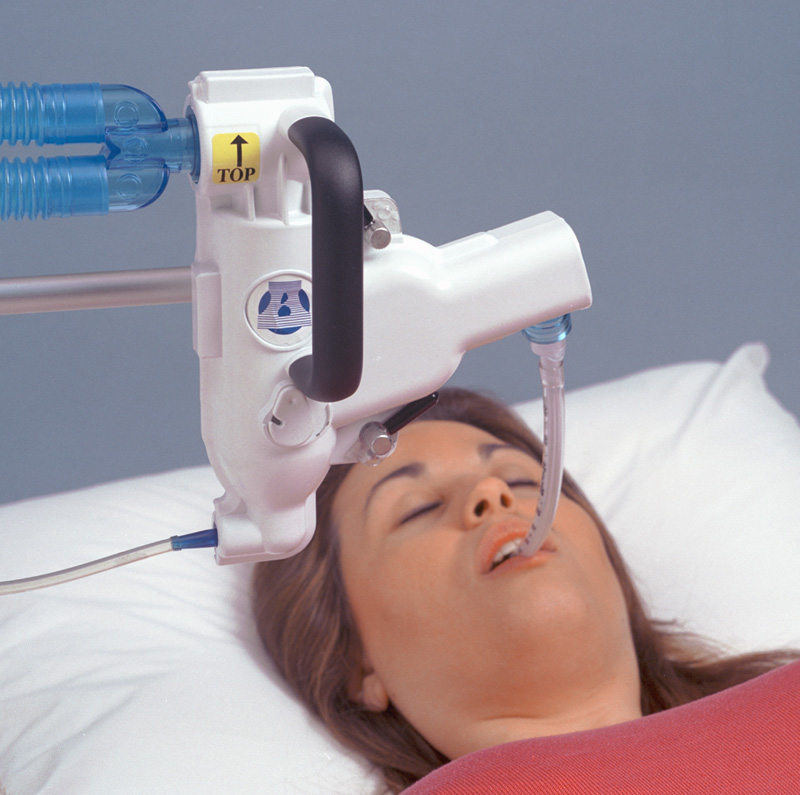
G. Supine Ventilation:
Attach shield to an IV pole following Shield Mounting instructions. Fit the mouthpiece to the adjustable “L” connector and loosely place the “L” connector onto the patient end of the Swirler. With the system positioned at the patient’s right side and mouthpiece over the mouth, cup the bottom of the shield with your right hand and the clamp knob with your left hand. Loosen the clamp while holding the shield firmly keeping it upright, slowly lower the shield and mouthpiece into patient’s mouth and tighten the clamp knob. Make sure the tongue is not occluding the opening, the bite bars separate the teeth, and the lips are over the mouthpiece flange for a good seal. Push the patient “L” inward, on the Swirler, for a good seal. Apply the noseclip and begin procedure.
(Return to beginning)
H. Upright Ventilation:
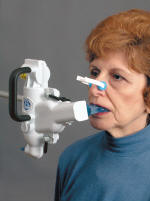
Attach shield to a table edge or IV pole following Shield Mounting instructions. Once shield height is adjusted, bring patient and system close together placing the mouthpiece in the patient’s mouth. Make sure the tongue is not occluding the opening, the bite bars separate the teeth, and the lips are over the mouthpiece flange for a good seal. Push the patient “L” inward, on the Swirler, for a good seal. Apply the noseclip and begin procedure.
(Return to beginning)
I. Ventilator-Assisted Patients:
The Swirler can easily be used with a ventilator-assisted patient. Coordinating with a respiratory technologist, disconnect the patient from the ventilator and connect the Swirler adjustable elbow to the trach tube (no additional adapter is required}.
If the Model #1201 tubing connector is used, it will connect directly to the trach tube as well. Then interconnect the Swirler exhaust elbow directly to the ventilator connector. Add a Bacteria Filter to this interconnection if ventilator contamination is a concern.
(Return to beginning)
J. Tubing:
1. Standard 22mm corrugated is NOT RECOMMENDED! This size tubing will decrease the efficiency of the study by adding dead space and wasting medication within tubing walls. This will also create unnecessary radiation exposure. If tubing must be used, we recommend using Extend-N-Bend TM (ENB) Tubing, model #1201, stretched only as far as needed.
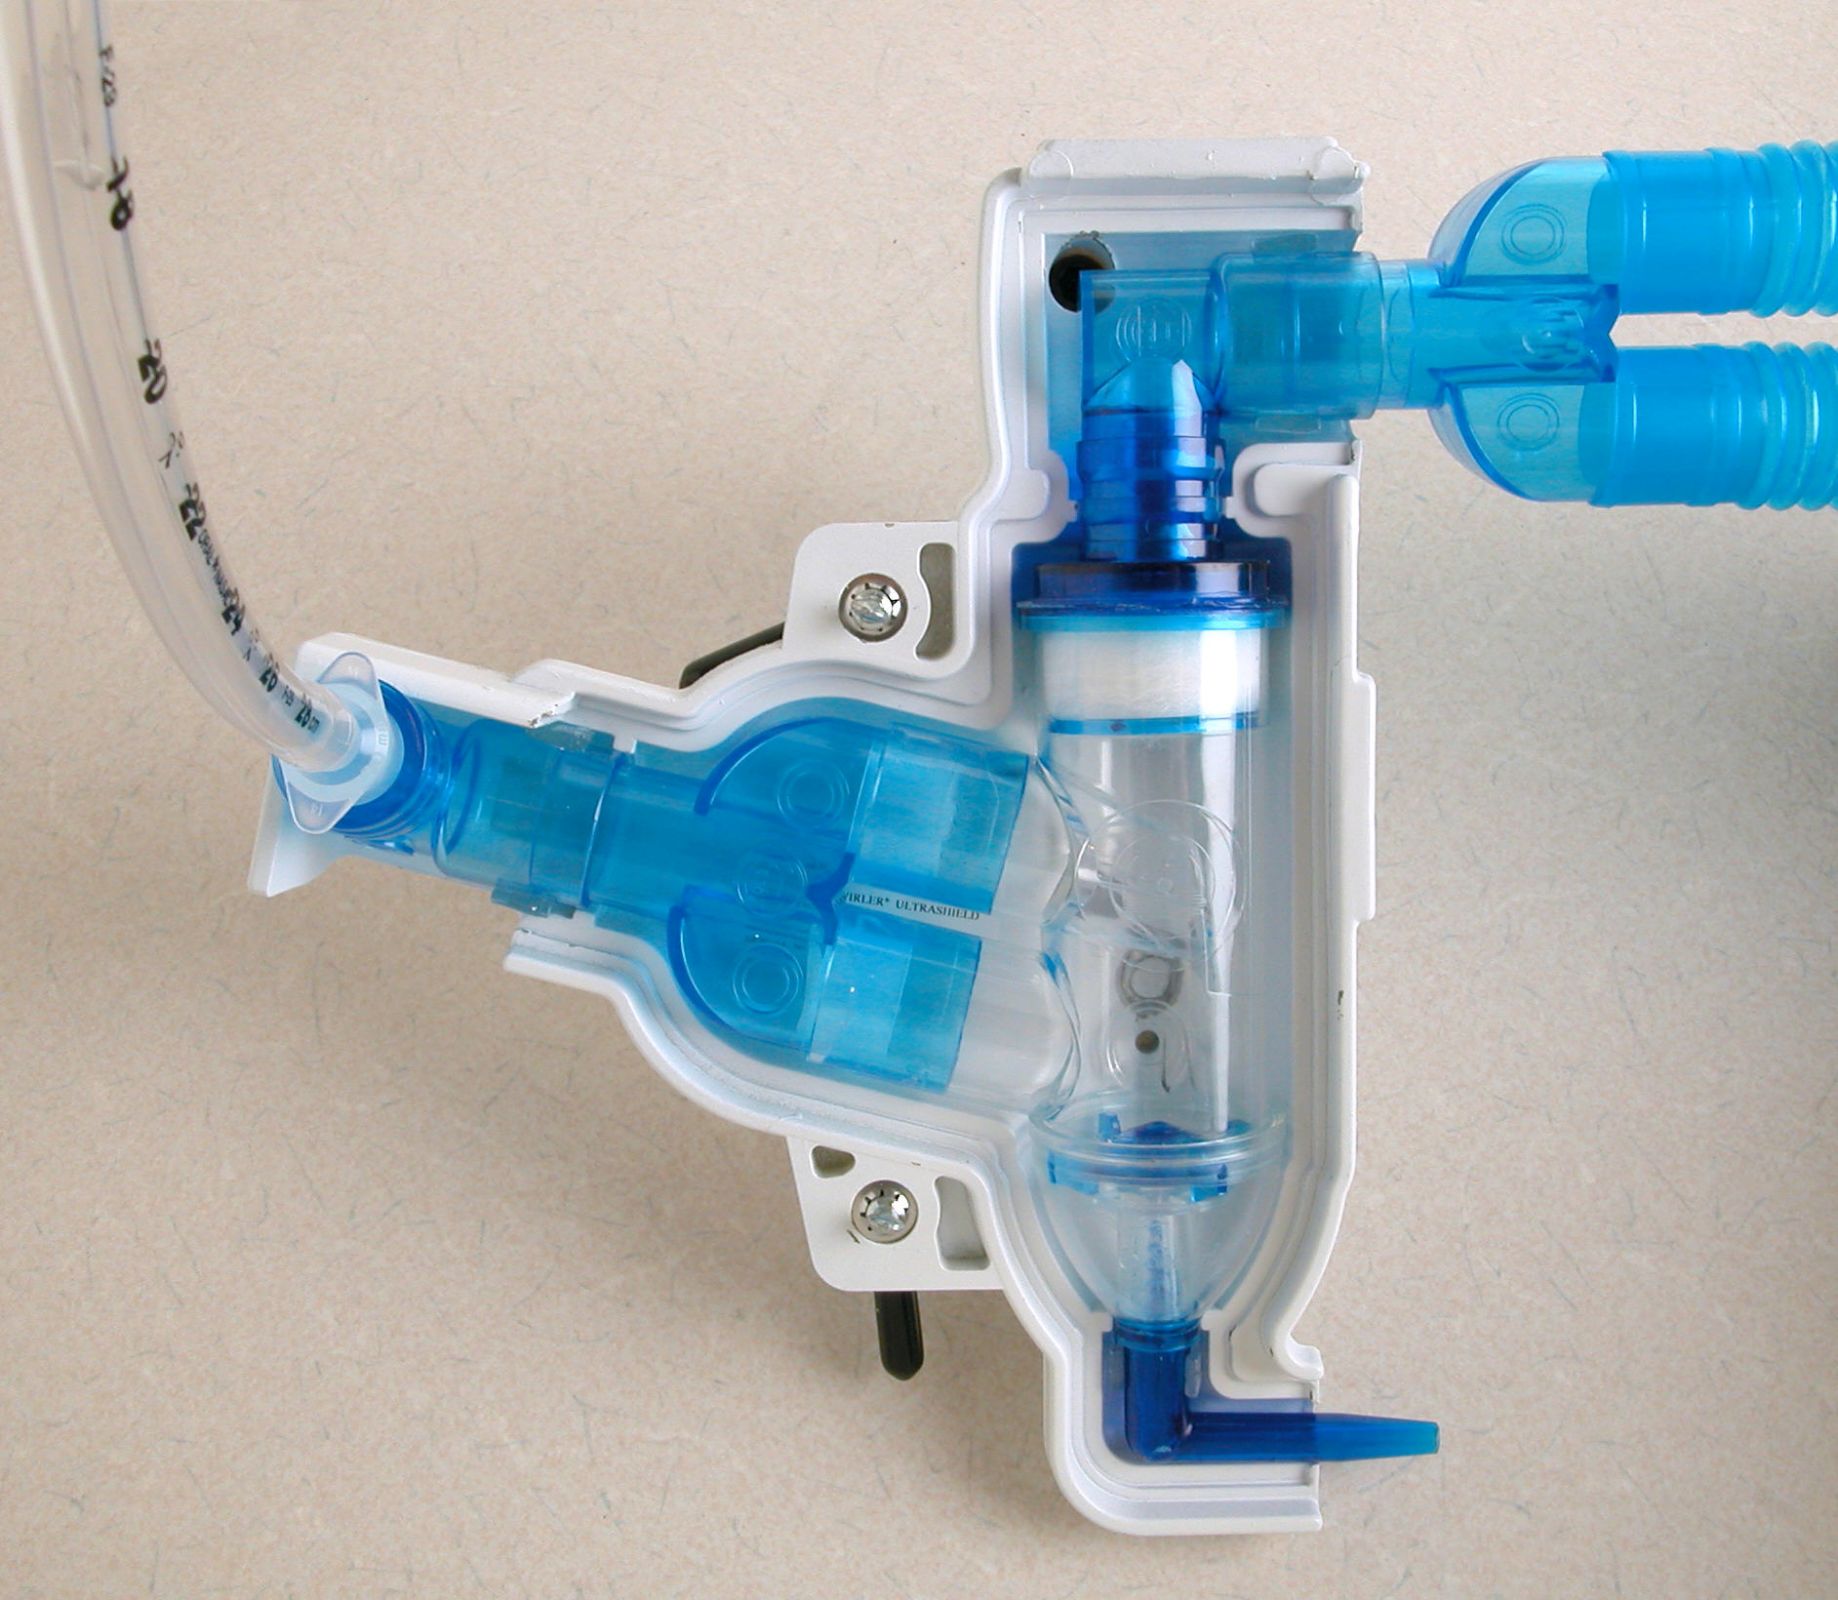
2. Oxygen tubing connections that will prevent damage to the aerosol system.
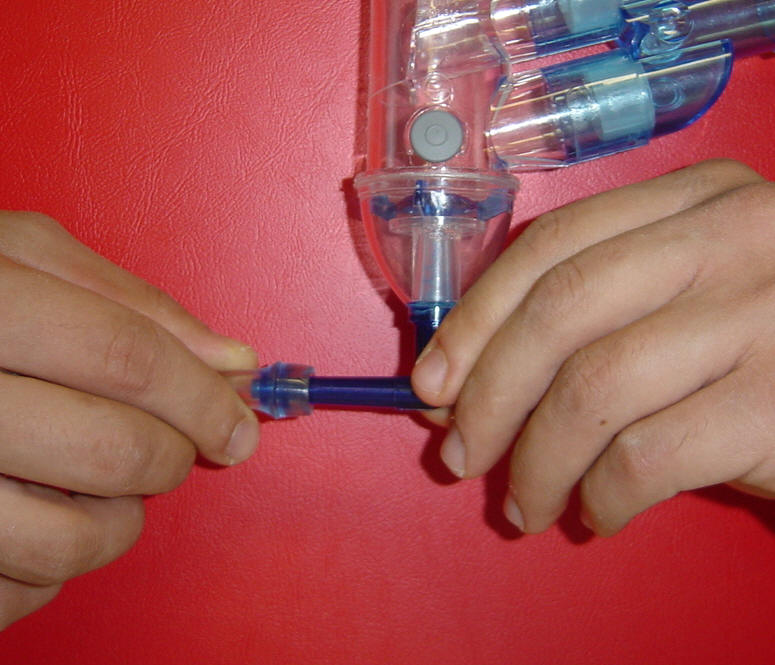
Outside of the UltraShield® = Connect the Oxygen tubing by
holding the oxygen elbow with one hand while pushing
and rotating the tubing on to the oxygen stem.
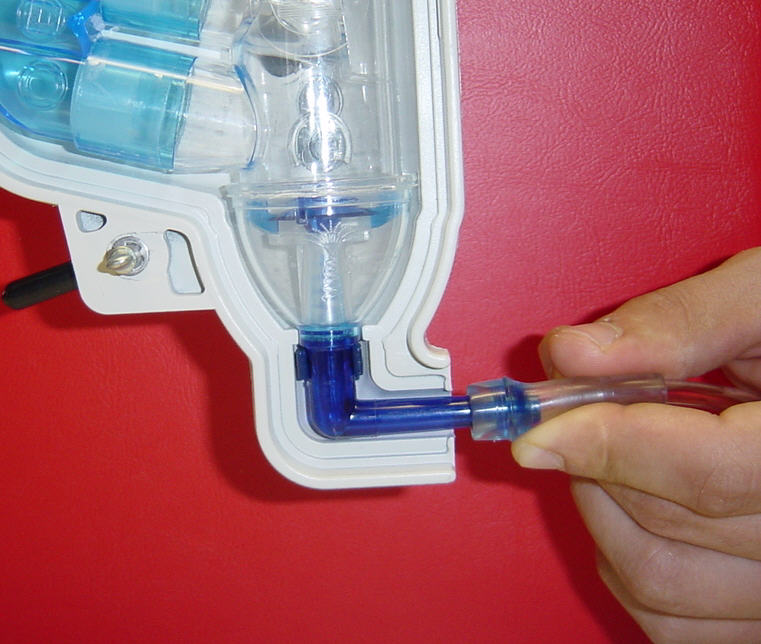
Inside of the UltraShield® = The Oxygen elbow is already
supported by the small snap clip, so to connect the tubing
just push and rotate the tubing on to the oxygen stem until it is secure.
(Return to beginning)
K. Using Masks:
MASKS ARE TO BE AVOIDED, unless absolutely necessary, due to the natural filtration system of the nasal passages. In those situations where the patient has difficulty holding the mouthpiece securely, we recommend using the SEAL-RITE Mouthpiece, model #1021, that seals over the lips and is held in place by a head strap. When using a mouthpiece, always use a noseclip. If possible, allow the patient to apply the noseclip for a comfortable fit. For oily skin, swipe sides of the nose with an alcohol swab prior to applying noseclip.
(Return to beginning)
L. Mouth and Stomach Activity:
To minimize mouth and stomach uptake, instruct the patient not to swallow during aerosol administration. After ventilation, have the patient rinse out his/her mouth.
(Return to beginning)
Typical choice is a General All Purpose type collimator. Use of a higher resolution collimator will result in a significant decrease in count rate and an increase in Dosing and Imaging Accumulation Times. The collimator should always be positioned flush to the patient to maximize resolution and count-rate efficiencies.
(Return to beginning)
E. Dose Quantity:
The typical dose is in the range of 15mCi (555 MBq) per cc (ml) for pre-perfusion and at least twice that for post perfusion with 1-2cc (ml) as a usual volume. For a lung ventilation study, the Swirler® Aerosol System is intended to be used with Technetium 99m-DTPA. The use of any other radiopharmaceutical could alter the production of aerosols and/or the efficacy of the filtration media resulting in sub-optimal quality images and contamination of the environment.
(Return to beginning)
F. Image Accumulation:
The typical image is in the range of 150 K preset counts for pre-perfusion and at least twice that for post perfusion. Gray scaling should be set to the same preset counts level used for the image accumulation.
(Return to beginning)
G. Supine Ventilation:
Attach shield to an IV pole following Shield Mounting instructions. Fit the mouthpiece to the adjustable “L” connector and loosely place the “L” connector onto the patient end of the Swirler. With the system positioned at the patient’s right side and mouthpiece over the mouth, cup the bottom of the shield with your right hand and the clamp knob with your left hand. Loosen the clamp while holding the shield firmly keeping it upright, slowly lower the shield and mouthpiece into patient’s mouth and tighten the clamp knob. Make sure the tongue is not occluding the opening, the bite bars separate the teeth, and the lips are over the mouthpiece flange for a good seal. Push the patient “L” inward, on the Swirler, for a good seal. Apply the noseclip and begin procedure.
(Return to beginning)
H. Upright Ventilation:
Attach shield to a table edge or IV pole following Shield Mounting instructions. Once shield height is adjusted, bring patient and system close together placing the mouthpiece in the patient’s mouth. Make sure the tongue is not occluding the opening, the bite bars separate the teeth, and the lips are over the mouthpiece flange for a good seal. Push the patient “L” inward, on the Swirler, for a good seal. Apply the noseclip and begin procedure.
(Return to beginning)
I. Ventilator-Assisted Patients:
The Swirler can easily be used with a ventilator-assisted patient. Coordinating with a respiratory technologist, disconnect the patient from the ventilator and connect the Swirler adjustable elbow to the trach tube (no additional adapter is required}.
If the Model #1201 tubing connector is used, it will connect directly to the trach tube as well. Then interconnect the Swirler exhaust elbow directly to the ventilator connector. Add a Bacteria Filter to this interconnection if ventilator contamination is a concern.
(Return to beginning)
J. Tubing:
1. Standard 22mm corrugated is NOT RECOMMENDED! This size tubing will decrease the efficiency of the study by adding dead space and wasting medication within tubing walls. This will also create unnecessary radiation exposure. If tubing must be used, we recommend using Extend-N-Bend TM (ENB) Tubing, model #1201, stretched only as far as needed.
2. Oxygen tubing connections that will prevent damage to the aerosol system.
Outside of the UltraShield® = Connect the Oxygen tubing by
holding the oxygen elbow with one hand while pushing
and rotating the tubing on to the oxygen stem.
Inside of the UltraShield® = The Oxygen elbow is already
supported by the small snap clip, so to connect the tubing
just push and rotate the tubing on to the oxygen stem until it is secure.
(Return to beginning)
K. Using Masks:
MASKS ARE TO BE AVOIDED, unless absolutely necessary, due to the natural filtration system of the nasal passages. In those situations where the patient has difficulty holding the mouthpiece securely, we recommend using the SEAL-RITE Mouthpiece, model #1021, that seals over the lips and is held in place by a head strap. When using a mouthpiece, always use a noseclip. If possible, allow the patient to apply the noseclip for a comfortable fit. For oily skin, swipe sides of the nose with an alcohol swab prior to applying noseclip.
(Return to beginning)
L. Mouth and Stomach Activity:
To minimize mouth and stomach uptake, instruct the patient not to swallow during aerosol administration. After ventilation, have the patient rinse out his/her mouth.
(Return to beginning)
M. Shield Mounting:
Caution: Do not inject isotope before mounting shield.
1. IV Pole Mounting: IV Pole must have a broad wheel base in order to safely support the extended weight of the shield. A correctly mounted shield is illustrated in your packaged instructions. Shield arm should be in horizontal position. In your right hand, hold the bottom of the shield with the injection opening and shield handle facing you. Hold the knob of the bar clamp with your left hand. Attach the shield clamp by positioning the IV Pole into the " V " groove of the clamp then tighten the screw firmly. This eliminates the angular torque forces which could cause breakage of the clamp screw and always centralizes the clamping forces. Make any necessary adjustments: To shorten or lengthen the distance of the shield on the arm, loosen the small knob attached to the bar clamp while holding the bottom of the shield in your right hand. This will allow you to support while sliding the bar back and forth. Tighten knob. Also, see Supine or Upright Ventilation.
2. Table Mounting: Shield bar should be in vertical position by adjusting knob on back of shield. A correctly mounted shield is illustrated in the sales literature. Clamp shield securely to the edge of the table nearest the patient. Shield should be upright with the 02 elbow at the bottom and exhaust elbow at the top. The shield handle and injection opening should be facing you. The adjustable patient elbow and mouthpiece should face the patient. If table is adjustable, raise and lower the table to adjust to patient height. Or, to raise or lower the shield, place your right under the shield while loosening the small knob on the clamp with your left hand This will allow you to slide the arm up and down. Tighten knob at desired height. Also see Upright Ventilation.
(Return to beginning)
N. Proper Pressure and Flow Rate:
8-12 liters per minute at 50psi (3.45 bar) is the optimal range of O2/air flow for operating the Swirler system. To assure proper oxygen flow to the Swirler Nebulizer it may be helpful to use a recently calibrated oxygen flow meter. Any variation in pressure and/or flow rate, whether intentional or not, will vary the aerosol depletion time (patient dosing time). Typical variations are shown in the chart below.
NOTE 1: You can check your system by performing the following test: Place 2.0cc (ml) of saline in the Swirler bowl. Caution: The Swirler must always be in the upright position. Adjust the Oxygen flow to 8 l/m at 50psi (3.45 bar). Observe the liquid level and time. If the Oxygen flow rate is correct, the liquid will completely aerosolize (the first noticeable interruption of aerosol) in approximately 4 minutes.
NOTE 2: Or you can simply increase the flow rate slightly (not to exceed 12 l/m) to achieve a more desirable patient dosing time. Typical variations are shown in the chart below.
(Return to beginning)
O. Dead Space Dimensions:
(Return to beginning)
P. Area Contamination Complaint:
The Swirler is designed for "Single Patient Use" to prevent cross contamination. Every Swirler Aerosol System is sonically welded and leak tested for quality acceptance before packaging and shipping to customers.
Possible sources of contamination are:
1. Excessive dosing time can cause leak through contamination of the over saturated filtration media. See B, E & N above on dosing location, quantity, pressure, flow and accumulation measurement using a survey meter.
2. The patient creates leaking gaps at the corners of his mouth either because he is not watched or instructed closely enough.
3. The patient is unsteady which can create the gaps. This problem should be anticipated by the technologist who would then choose to use our #1021 rather than our #1030 mouthpiece. The #1021 has an over the lips sealing flange and a head strap to create a good seal. For the unsteady part, add a #1201 ENB tubing and extend it to absorb the patient's motion. If this is unclear phone, FAX or e-mail AMICI with your questions.
4. The air/O2 supply was not turned off prior to detaching the patient. The patient should take a minimum of 3 breaths after the air/O2 is turned off so the residual aerosol is depleted from the system.
5. The air/O2 is turned on prior to connecting the patient causing aerosol to be generated into the environment.
6. The Swirler is not kept upright after dosing the patient. Even one drop of residual activity amounts to a measurable contamination level.
(Return to beginning)
Caution: Do not inject isotope before mounting shield.
1. IV Pole Mounting: IV Pole must have a broad wheel base in order to safely support the extended weight of the shield. A correctly mounted shield is illustrated in your packaged instructions. Shield arm should be in horizontal position. In your right hand, hold the bottom of the shield with the injection opening and shield handle facing you. Hold the knob of the bar clamp with your left hand. Attach the shield clamp by positioning the IV Pole into the " V " groove of the clamp then tighten the screw firmly. This eliminates the angular torque forces which could cause breakage of the clamp screw and always centralizes the clamping forces. Make any necessary adjustments: To shorten or lengthen the distance of the shield on the arm, loosen the small knob attached to the bar clamp while holding the bottom of the shield in your right hand. This will allow you to support while sliding the bar back and forth. Tighten knob. Also, see Supine or Upright Ventilation.
2. Table Mounting: Shield bar should be in vertical position by adjusting knob on back of shield. A correctly mounted shield is illustrated in the sales literature. Clamp shield securely to the edge of the table nearest the patient. Shield should be upright with the 02 elbow at the bottom and exhaust elbow at the top. The shield handle and injection opening should be facing you. The adjustable patient elbow and mouthpiece should face the patient. If table is adjustable, raise and lower the table to adjust to patient height. Or, to raise or lower the shield, place your right under the shield while loosening the small knob on the clamp with your left hand This will allow you to slide the arm up and down. Tighten knob at desired height. Also see Upright Ventilation.
(Return to beginning)
N. Proper Pressure and Flow Rate:
8-12 liters per minute at 50psi (3.45 bar) is the optimal range of O2/air flow for operating the Swirler system. To assure proper oxygen flow to the Swirler Nebulizer it may be helpful to use a recently calibrated oxygen flow meter. Any variation in pressure and/or flow rate, whether intentional or not, will vary the aerosol depletion time (patient dosing time). Typical variations are shown in the chart below.
NOTE 1: You can check your system by performing the following test: Place 2.0cc (ml) of saline in the Swirler bowl. Caution: The Swirler must always be in the upright position. Adjust the Oxygen flow to 8 l/m at 50psi (3.45 bar). Observe the liquid level and time. If the Oxygen flow rate is correct, the liquid will completely aerosolize (the first noticeable interruption of aerosol) in approximately 4 minutes.
NOTE 2: Or you can simply increase the flow rate slightly (not to exceed 12 l/m) to achieve a more desirable patient dosing time. Typical variations are shown in the chart below.
| Flow Rate | Depletion time in minutes | ||
| 8 l/min. | 4.00 | 5.07 | 5.28 |
| 9.l/min. | 3.50 | 4.69 | 4.83 |
| 10 l/min. | 3.16 | 3.33 | 4.16 |
| 11 l/min. | 2.59 | 3.02 | 3.40 |
| 12 l/min. | 2.38 | 2.90 | 3.23 |
| Pressure | 50 psi | 45 psi | 40 psi |
O. Dead Space Dimensions:
| DESCRIPTION | VOLUME |
| within “Y” and patient elbow | 14cc |
| within “Y”, patient “L” and #1030 mouthpiece | 22cc |
| within “Y”, patient “L” and #1201 ENB™ tubing at short length | 25cc |
| within “Y”, patient “L” and #1201 ENB™ tubing at long length | 36cc |
| within “Y”, patient “L”, #1030 and #1201 ENB™ tubing when short | 33cc |
| within “Y”, patient “L”, #1030 and #1201 ENB™ tubing when long | 44cc |
| within #1201 ENB™ tubing extended to 5” ( preferred) | 24cc |
| within #1106 6” corrugated tubing ( not recommended) | 62cc |
| Nebulizer Reservoir Capacity | 9cc |
P. Area Contamination Complaint:
The Swirler is designed for "Single Patient Use" to prevent cross contamination. Every Swirler Aerosol System is sonically welded and leak tested for quality acceptance before packaging and shipping to customers.
Possible sources of contamination are:
1. Excessive dosing time can cause leak through contamination of the over saturated filtration media. See B, E & N above on dosing location, quantity, pressure, flow and accumulation measurement using a survey meter.
2. The patient creates leaking gaps at the corners of his mouth either because he is not watched or instructed closely enough.
3. The patient is unsteady which can create the gaps. This problem should be anticipated by the technologist who would then choose to use our #1021 rather than our #1030 mouthpiece. The #1021 has an over the lips sealing flange and a head strap to create a good seal. For the unsteady part, add a #1201 ENB tubing and extend it to absorb the patient's motion. If this is unclear phone, FAX or e-mail AMICI with your questions.
4. The air/O2 supply was not turned off prior to detaching the patient. The patient should take a minimum of 3 breaths after the air/O2 is turned off so the residual aerosol is depleted from the system.
5. The air/O2 is turned on prior to connecting the patient causing aerosol to be generated into the environment.
6. The Swirler is not kept upright after dosing the patient. Even one drop of residual activity amounts to a measurable contamination level.
(Return to beginning)
Chose from the menu here to see full details and pictures


